Workflow Designer
The Workflow Designer is a visual editor for building and customizing integration workflows. Combine AI-powered generation with manual fine-tuning to create exactly the workflow you need.
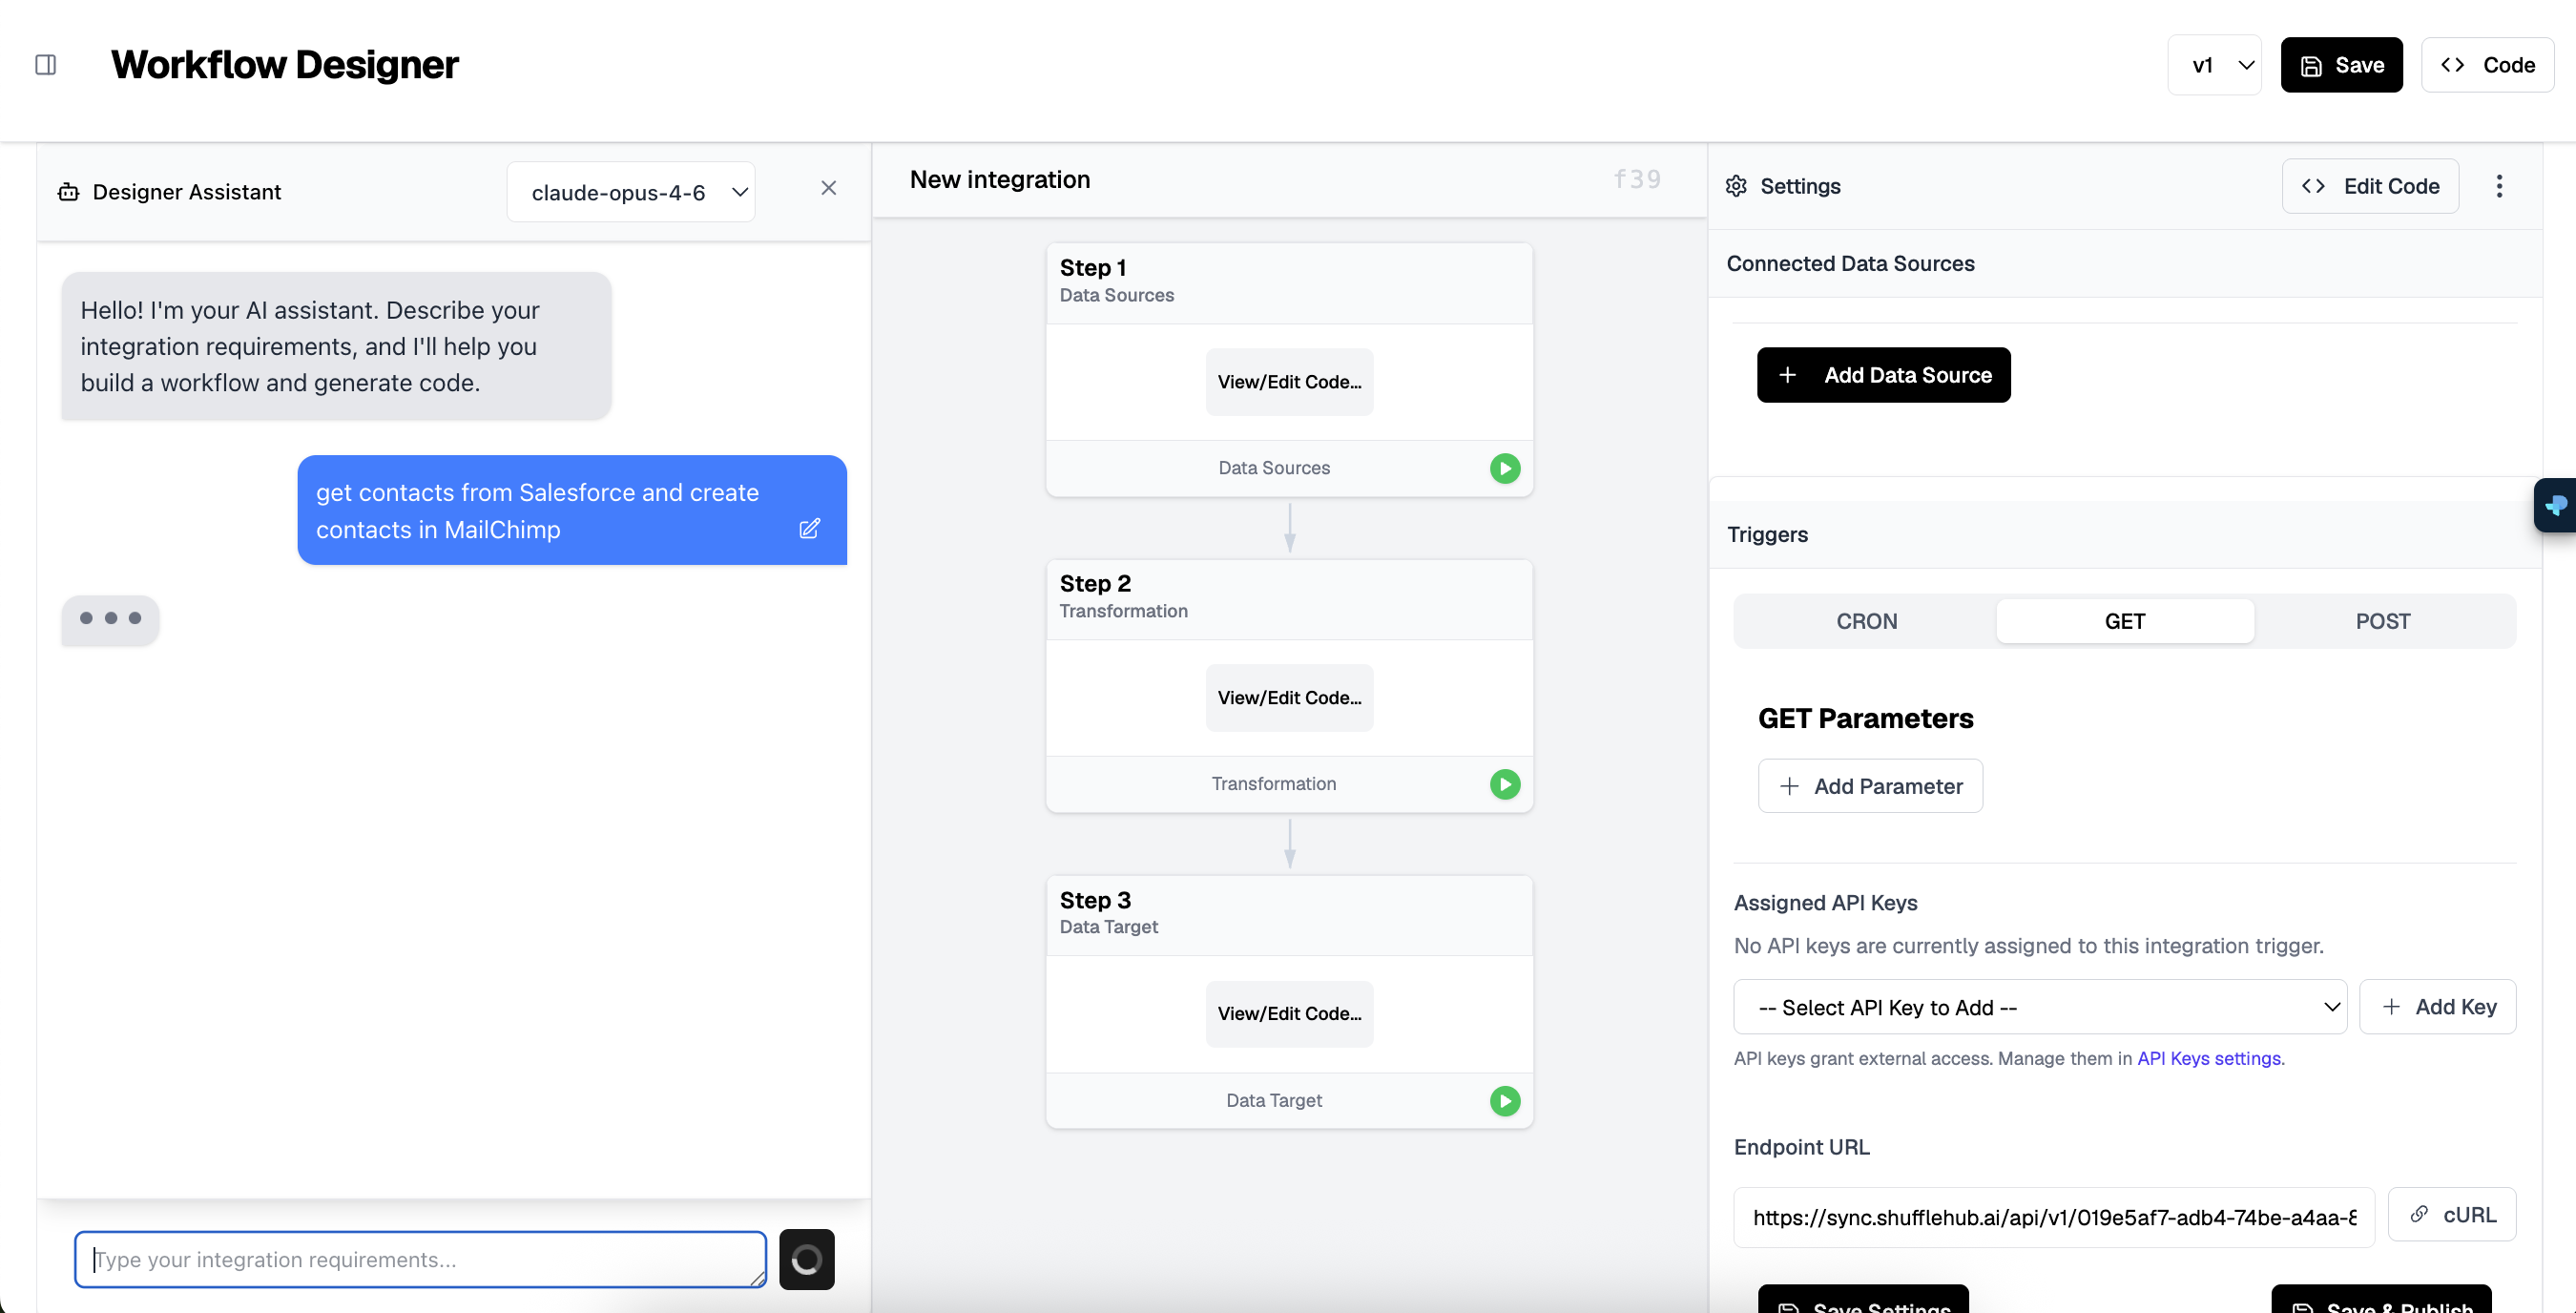
Interface Overview
The Workflow Designer is divided into three main sections:
Left Panel: Designer Assistant
The AI-powered chat interface where you describe your integration requirements. The assistant understands natural language and generates workflow code based on your description.
Center Panel: Visual Workflow
A visual representation of your integration steps. Each workflow consists of three main stages:
- Step 1 - Data Sources: Fetch data from your connected platforms
- Step 2 - Transformation: Transform, filter, and map data fields
- Step 3 - Data Target: Send processed data to the destination
Right Panel: Settings
Configure workflow settings including data sources, triggers, API keys, and endpoint URLs.
Building a Workflow
Adding Data Sources
Click + Add Data Source in the Settings panel to connect platforms to your workflow. Only data sources you have configured in the Data Sources page will be available here.
Editing Step Code
Click View/Edit Code on any step to open the code editor. The code is written in JavaScript and can access:
dataSources- Your connected platform APIsparams- Trigger parameters passed to the workflowpreviousStep- Data from the previous stephelpers- Utility functions for common operations
Code Execution
Configuring Triggers
Triggers determine when and how your workflow executes. Choose from three types:
CRON Triggers
Schedule your workflow to run at specific intervals using CRON expressions:
*/5 * * * *- Every 5 minutes0 * * * *- Every hour0 0 * * *- Daily at midnight0 9 * * 1-5- Weekdays at 9 AM
GET Triggers
Trigger your workflow via HTTP GET request. Useful for webhooks or manual triggers from external systems. Add query parameters that become available in your workflow code.
POST Triggers
Trigger via HTTP POST with a JSON payload. The request body is parsed and available in your workflow as params. Ideal for receiving data from external systems.
API Keys and Endpoints
Assigning API Keys
For GET and POST triggers, you can assign API keys to authenticate incoming requests. Select an existing key from the dropdown or create a new one in Org Settings.
Security
Endpoint URL
Each workflow has a unique endpoint URL in the format:
https://sync.shufflehub.ai/api/v1/{workflow-id}Use the cURL button to copy a ready-to-use curl command for testing.
Saving and Publishing
Save Settings
Click Save Settings to save your trigger configuration without publishing code changes.
Save & Publish
Click Save & Publish to save your workflow and make it active. This creates a new version that will be used for subsequent executions.
Version Control
Use the version dropdown (e.g., v1, v2) to switch between different versions of your workflow. This allows you to test changes without affecting the production workflow.
Testing Your Workflow
Each step has a green play button that runs that specific step in isolation. Use this to:
- Verify your data source connection
- Test transformation logic with real data
- Confirm the target destination receives data correctly
Debugging
console.log() in your workflow code to output debug information. View the output in the execution logs after running your workflow.